A Guide to Baking With Stone-Ground, Whole-Grain Flour
Whether you’re a brand-new baker or a seasoned bread pro, baking with stone-ground flour made from local wheat can be a fairly heady challenge. Why? Because local flour can be remarkably different from the inexpensive commodity flour found on grocery store shelves nationwide.
Where commodity flour is engineered to be consistent, with wheat bred to specific uniform qualities that produce dependable results, local stone-ground flour is the result of regional terroir, locally grown wheat, and varying milling techniques, like sifting. That means it can require some intuition and education to get your baked goods right. But if you’re committed to supporting your local grain shed by baking with local four, where and how should you start?
The first thing any baker new to stone-ground, whole-grain flour needs is a local source for flour. There are many handy lists for local mills making flour with regional wheat — mine is Castle Valley Mill in Bucks County, Pennsylvania. Though there are far fewer local mills than there were in the 1800s, the recent boom in bread baking, along with pandemic-related commodity flour shortages, has led to an explosion of local mills producing flour on stone mills from regional wheat. Although most if not all of them ship their flour nationwide, choosing flour milled locally to you often means you get to taste your region’s terroir, seasonal wheat differences and breeds, and the influence of diverse milling and extraction techniques. When you’re choosing which flour to buy, keep a couple of guidelines in mind: If a lot of bran is not your thing, try more heavily sifted flours; hard wheats are typically better for bread; soft wheats are typically better for pastries, biscuits and other baked goods.
Once you have your local flours, there is a large and growing list of cookbooks on the subject to get you started baking. Mother Grains by Roxana Jullapat, The Miller’s Daughter by Emma Zimmerman, The Flour Lab by Adam Leonti, and Southern Ground by Jennifer Lapidus are all great resources, with recipes tailored to a range of skill sets.
Many flour experts suggest starting out by integrating a small percentage of stone-ground flour into your baked goods to get a sense of how it will perform and taste. “You could swap out a little bit of your flour and some whole grain to get some tooth and flavor — 10 to 15 percent,” says Lapidus, the founder of Carolina Ground flour mill in Asheville, North Carolina. “It won’t really affect the performance of what you’re going to do.” If you go up to 40 or 50 percent, you’ll notice the qualities of the flour: It will absorb water faster. More bran-heavy flour can be tricky to work with in pie dough and lighter baked goods, as its heavier components can sever delicate gluten strands. With sourdough breads, you’ll notice fermentation happens faster, as the naturally rich nutrients stimulate fermentation, so keep an eye on your dough, as it may rise faster than you’re used to.
If all of that sounds a little scary or complicated, Lapidus offers some advice. “My biggest hard-and-fast rule is to not be married to the recipe in front of you, as in use it as a guide,” she says. “It’s a process of learning.” Get to know the flavor of your flour — though don’t get too attached to it, as the wheat harvest can change year to year — and decide which varieties work best for you. “Salted rye cookies are a great place to go in and try with different ryes,” Lapidus says. “[I use] a medium sift and a light sift, just to see what I like the best.”
And, Lapidus adds, “good baking tools help you work with wet doughs.” The bench scraper, for example, is your friend, as are the refrigerator and freezer, which allow your doughs to properly hydrate and develop structure and flavor, and also slow down the fast fermentation process. Lapidus almost always recommends storing pie dough and delicate pastry dough overnight in the fridge before attempting to work with them.
Have any questions along the way? After two years of the pandemic and regular commodity flour shortages, most local millers are extremely accustomed to talking with customers about how to use their flours. Get in touch, ask questions, and jump in feet-first. “Baking is a very emotional experience, at least bread baking [is],” Lapidus says. “For me, as a baker, yes, we want our cultures to be active, we want our bread to be successful, there’s this dance of time and temperature, but it’s [about] continuing to add to that equation, adding another layer.
“There’s just so much more to draw from today than when I started baking,” she adds.
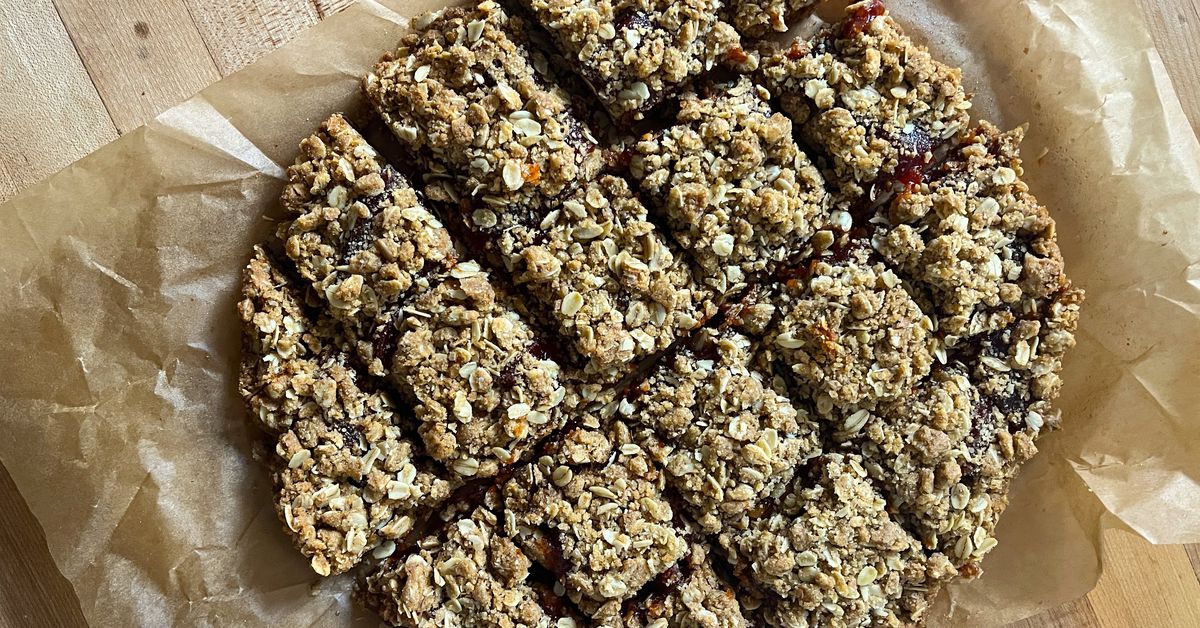
Baker Joe Bowie’s recipe for Guava Crumble Bars, which appears in Lapidus’s Southern Ground cookbook, is an excellent entry point for any baker interested in exploring stone-ground flours. That’s because it calls for a Trinity Blend flour, which is equal parts stone-ground rye, stone-ground soft wheat, and stone-ground hard wheat flour — you can make your own blend with one cup of each, or order the blend from Carolina Ground. Either way, you get to experiment with three flours at once, each one a pathway to a world of stone-ground possibility.
Guava Crumble Bars Recipe
Makes 16 bars
Ingredients:
1¾ cups (170 grams) rolled oats
1⅔ cups (175 grams) Trinity Blend flour
1 cup (200 grams) light brown sugar
¾ teaspoon fine sea salt
½ teaspoon baking soda
¾ cup (170 grams) unsalted butter, melted and cooled slightly
1 (14.5-ounce) block guava paste
Instructions:
Step 1: Preheat the oven to 350 degrees. Butter a 9-inch square pan and line it with parchment paper, leaving a few inches hanging over the sides. Butter the parchment as well.
Step 2: In a large bowl, combine the oats, flour, brown sugar, salt, and baking soda. Give the mixture a stir. Add the melted butter and mix until well-incorporated.
Step 3: Press half the crumble mixture into an even layer over the bottom of the prepared pan.
Step 4: Slice the block of guava paste into ¼-inch-thick slices and layer them in a single layer over the crumble layer, leaving about a ¼-inch border around the guava paste slices. Evenly distribute the remaining crumble on top of the guava layer. (There’s no need to press down the crumble layer onto the guava.)
Step 5: Bake for 25 to 30 minutes, until the crumble on top is golden brown and a tiny bit puffed.
Step 6: Remove from the oven and set the pan on a cooling rack. Let cool completely, then remove from the pan using the overhanging parchment and transfer to a cutting board. (It should come out easily; if not, run a knife or offset spatula around the edges and then try again.) Cut into 16 pieces. Once fully cool, store in an airtight container in the refrigerator for up to a week.
Reprinted with permission from Southern Ground by Jennifer Lapidus, copyright © 2021. Published by Ten Speed Press, an imprint of the Crown Publishing Group.